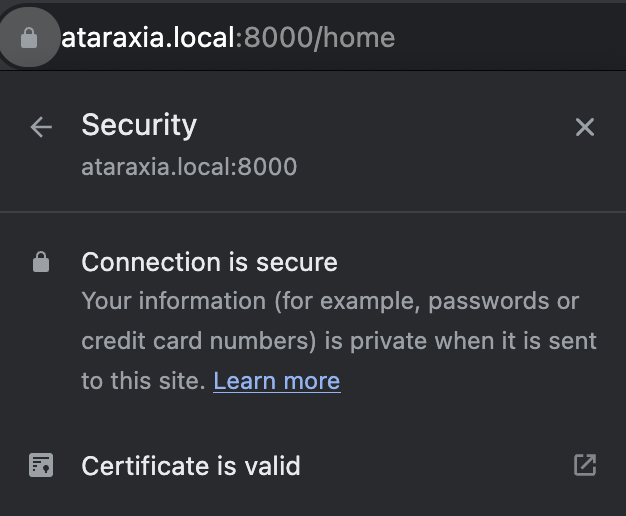
Now it is possible to run Flutter web debug server with TLS locally. The change #60704: Pass cert for TLS localhost connection was merged with master recently and tagged with 3.17.0-11.0.pre. This adds two new command line arguments --web-tls-cert-path and --web-tls-cert-key-path. We can run the debug server with TLS like below.
flutter run -d chrome --debug --web-port 8080 --web-hostname ataraxia.local --web-tls-cert-path dev/localhost.cert.pem --web-tls-cert-key-path dev/localhost.key.pemMy use case
I wanted to test the Flutter web app on mobile browser on a phone. So I want to connect to the debug server from the internal network. We can simply change the hostname to 0.0.0.0 to accept connections from the local network and it connects from the phone except that the app doesn't work because it uses flutter_secure_storage package which runs only if it is localhost or HTTPS. So 0.0.0.0 doesn't work.
I have seen lots of requests for TLS support for Flutter web so that authentication methods like OAuth2 can be tested locally which expects the callback server to be running in HTTPS mode. So now we have HTTPS support for debug server.
Generating Local SSL Certificate on macOS
- First we need to create a Certificate Authority. For that open
KeyChain Access > Create a Certificate Authorityand enter the details as shown below.Name: Foo Root CA Enter a name for the Root CA Certificate. Can be any name. Identity Type: Self-Signed Root CA User Certificate: SSL Server Enable Make this CA the default Email from: enter your email address > createThis will generate the root CA certificate. From KeyChain Access right click on the generated root CA >
Get Info> expandTrustand forWhen using this certificateselectAlways Trust. Close the window, enter the password for the change to get saved. - Next we need to create a certificate. From
KeyChain Access > Certificate Assistant > Create a Certificate. Fill the details as given below.
Name: ataraxia.local
This is your system name as it appears in 'Local hostname' under 'Sharing' in 'System Settings'.
Identity Type: Leaf
Certificate Type: SSL Server
Enable Let me override defaults
> continue

Validity Period (days) can be adjust as needed: 1827 (5 years)
> continue

Email address: any
Name (common name): ataraxia.local
This should match the address where the debug server will be served locally
Fill out rest of the location details
> continue

Select the root CA created from above
> continue

Key Size: 2048 bits (default)
Algorithm: RSA (default)
> continue

Key Usage Extension
Enable Include Key Usage Extension, This extension is critical.
And for capabilities enable only Signature.
> continue

Extended Key Usage Extension
Enable Include Extended Key Usage Extension, This extension is critical.
And for capabilities enable SSL Server Authentication only.
> continue

Do not select Include Basic Constraints Extension
> continue

Enable Include Subject Alternative Name Extension
dNSName: ataraxia.local
iPAddress: 192.168.1.2
The system's IP address
The server will work without enabling this option also. But Chrome will not recognize the certificate as trusted even though it's trusted in KeyChain. Safari works without any issues.
> continue

Keychain: login
> create
This will show that the certificate has been successfully created. Trust the certificate by right clicking on it > `Get Info` > expand `Trust` and for `When using this certificate` select `Always Trust`. Close the window, enter the password for the change to get saved.
-
Next we need to export the certificates from KeyStore.
Select the certificate (ataraxia.local) and chooseFile > Export Items...and save it asataraxia.local.cer. The file format needs to beCertificate (.cer)instead of the default.p12.
Next expand the certificate and select the private key (ataraxia.local) and export it asataraxia.local.key.p12. The file format is the defaultPersonal Information Exchange (.p12). Don't enter any password for the key file and enter the system password when asked. -
Next we need to convert the files to PEM format.
Converting private key to PEM format
openssl pkcs12 -in ataraxia.local.key.p12 -nocerts -nodes | openssl rsa > ataraxia.local.key.pem
Enter Import Password:
Error outputting keys and certificates
80BB7753F87F0000:error:0308010C:digital envelope routines:inner_evp_generic_fetch:unsupported:crypto/evp/evp_fetch.c:342:Global default library context, Algorithm (RC2-40-CBC : 0), Properties ()
Could not find private key from ..openssl pkcs12 -in ataraxia.local.key.p12 -nocerts -legacy -nodes | openssl rsa > ataraxia.local.key.pemopenssl version
OpenSSL 3.2.0 23 Nov 2023 (Library: OpenSSL 3.2.0 23 Nov 2023)p12 private key, right click > Export > Export Private Key > don't enter password > choose openssl for key type > untick encrypt, tick PEM and save.Convert certificate from CER to PEM
openssl x509 -inform der -in ataraxia.local.cer -out ataraxia.local.cert.pem- Copy
ataraxia.local.cer.pemandataraxia.local.key.pemto the Flutter project root directory or saydevfolder under root.
We can now run the debug server with HTTPS using:
flutter run -d chrome --debug --web-port 8080 --web-hostname ataraxia.local --web-tls-cert-path dev/ataraxia.local.cert.pem --web-tls-cert-key-path dev/ataraxia.local.key.pemlaunch.json.{
"name": "Chrome TLS (debug mode)",
"request": "launch",
"type": "dart",
"program": "lib/main.dart",
"flutterMode": "debug",
"args": ["-d", "chrome","--web-port", "8000", "--web-hostname", "ataraxia.local", "--web-tls-cert-path", "dev/ataraxia.local.cert.pem", "--web-tls-cert-key-path", "dev/ataraxia.local.key.pem"]
}